Friday, April 27, 2012

perfect points 
You know that rush you get when your points are absolutely perfect? I'm having that rush now.....I guess I am a little crazy, but the perfectionist in me can't handle not getting the points just right. I can not wait to show you what I am working on! Have a wonderful weekend everyone!

Thursday, April 26, 2012

Lazy and cheap girl's pillow revamp... sort of tutorial ;)


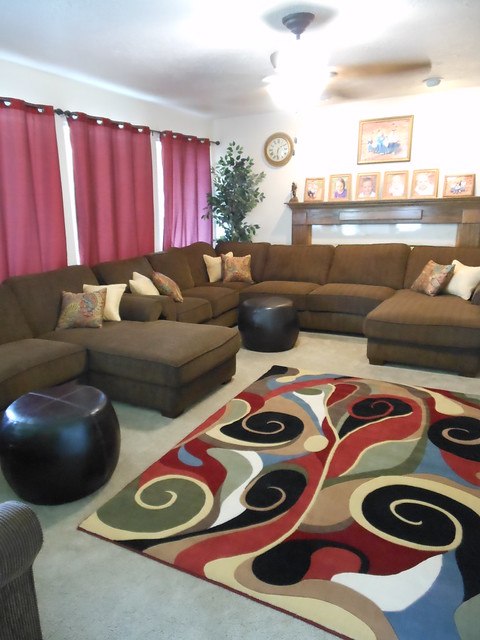
So, my couches are brown, and I like them (even though they are brown) - but our pillows were dead and needed some sprucing up.  I went to a few places just to buy pillows because Clint said I would never get to making them myself.  I took that as a challenge, especially when I priced out the pillows I wanted and the cheapest ones were $20 a piece, the ones I really wanted were $40 bucks a piece. I have six pillows, but I wanted to add six more because we have two sectionals in our family room and there is a ton of room for extra pillows.  So, I went to Joann's and picked out some gold suede and some tapestry fabric for the pillows - thankfully they were both on sale for 40% off.  Then, I checked out the pillow forms.  Holy crap - I had no idea that pillow forms were like $12-21 bucks.  Shocker - no way was I going to spend as much on the pillows as buying them already made.  So, I went to good old Walmart - don't judge - you know you go there too - and I bought their queen size firm pillows for $5.98.  I bought 6 pillows and ended up with 12.  Read on if you want to know how.........
  

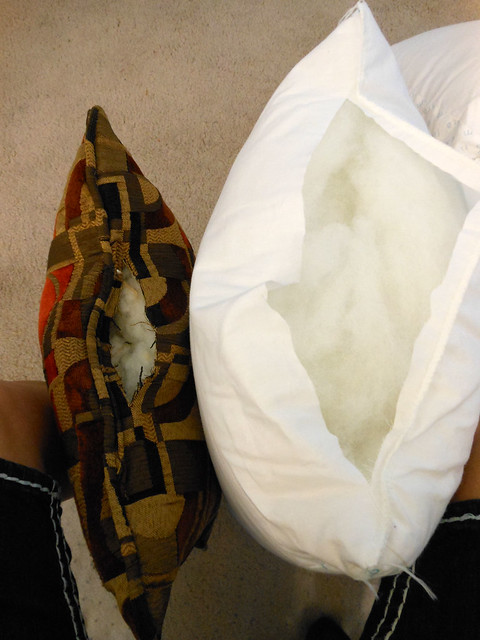
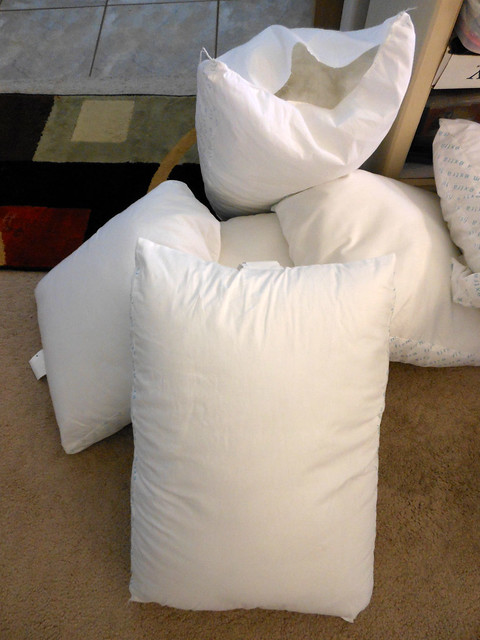
Since my pillows were dead and I was covering them anyway - I cut a slit in the fabric of the pillow and the pillow from Walmart.  Then, I took some stuffing from the Walmart pillow and stuffed it into the dead pillow.  Lovely - I didn't even worry about closing this baby up because you know that in a few months I am going to have to add more stuffing into because even though the kids know they aren't supposed to play with these pillows - they will.

3 

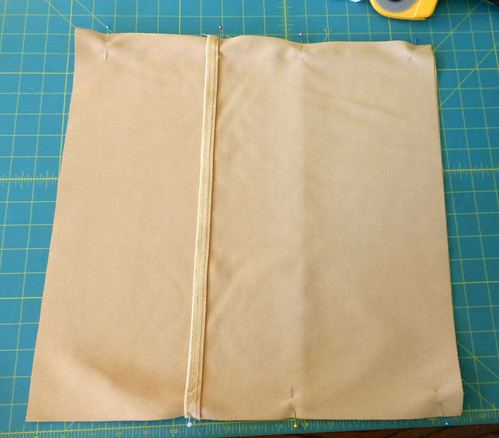
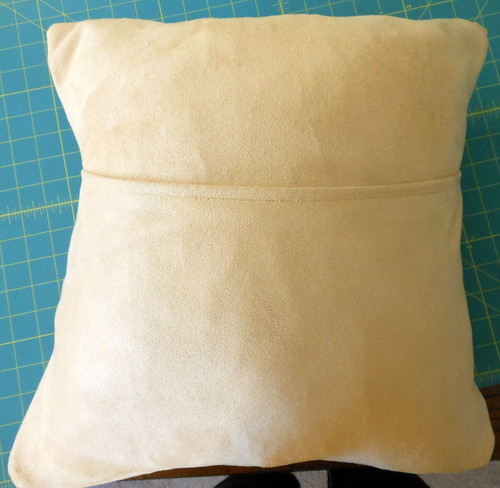
So, I cut out a 16 1/2 inch square for the front of the pillow. Then I cut out 2 rectangles 16 1/2 x 11 1/2 inches and sewed an edge on one side of each rectangle. Then, I placed them right sides together - pinned them in place and sewed all the way around the pillow. 

4 

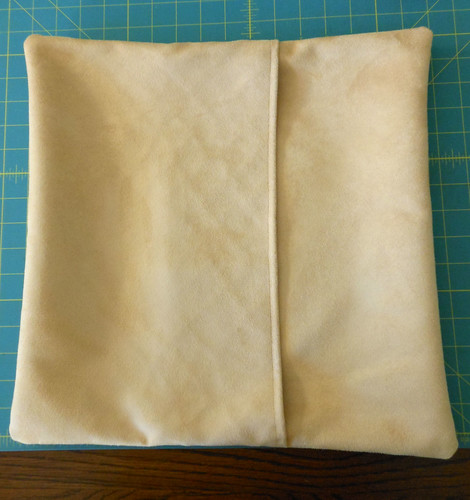
Then I turned the pillow right sides out. 

5 

Put the newly stuffed dead pillow inside.

6 

And there you go - quick fix for the old pillows.

7 

The before picture.
 
 8 

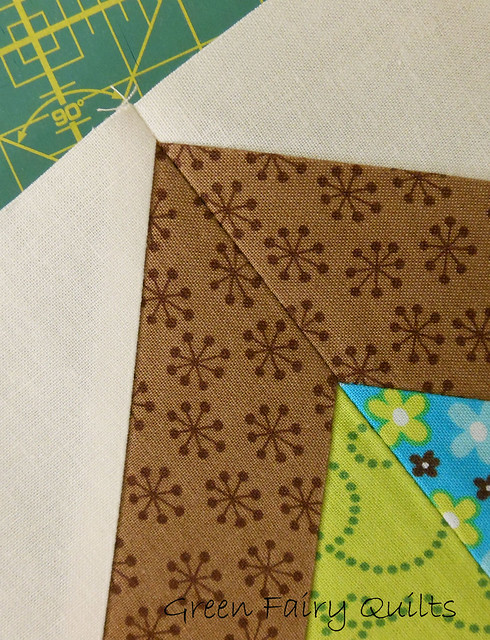
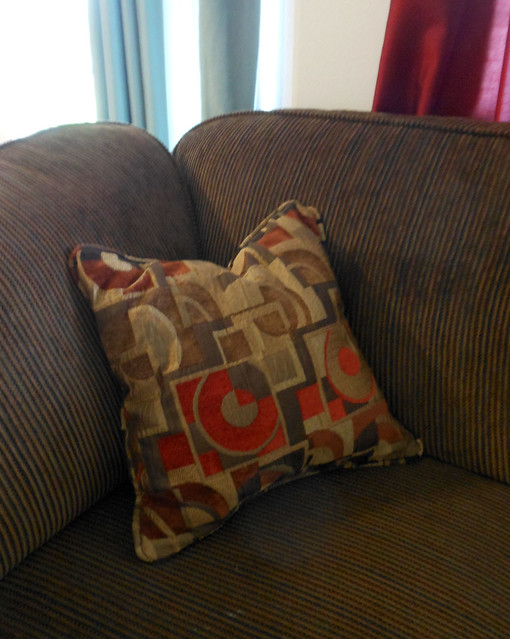
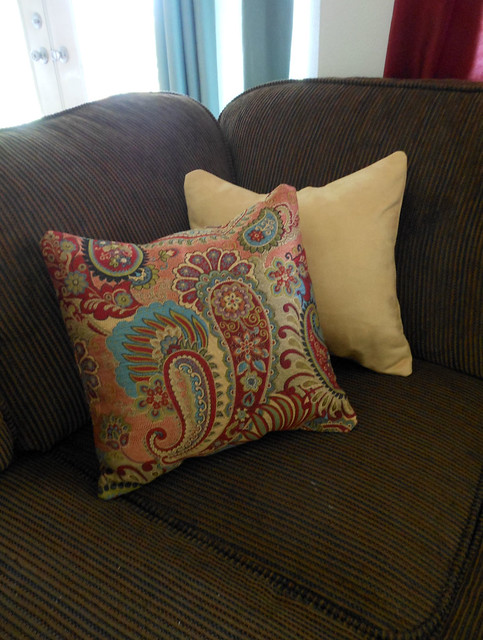
The yummy tapestry fabric.
 
 9 

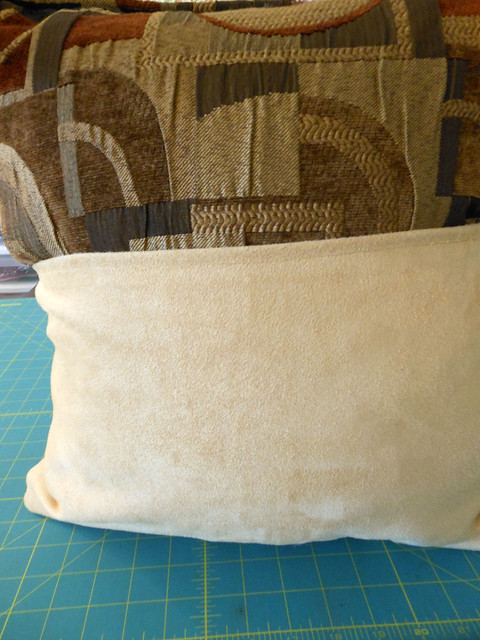
Same technique with the tapestry - then I took the remaining Walmart pillow, I didn't even bother to sew it shut, and stuffed it into the new tapestry pillow I made. So, there you have it - two pillows out of one and that makes the pillow forms only $3 bucks!

 Untitled 

Then, of course I had to get a rug to tie it all in. I love little fixes that make rooms more lively, and I especially love it when Clint loves that I made the pillows myself! Told you I could do it, Honey!

Monday, April 23, 2012


Spring is here and the roses are in bloom! Isn't this beautiful? It is crazy around here. Tons of things going on, but I did manage to take time today to smell the roses. 
I wanted to make you aware of a couple of things.  I will be participating in Quiltmaker's100 blocks blog tour and my day is Tuesday, May 1st.  You will see my block in a couple different color schemes.

     My block is on the cover (I can't believe it), but you will have to wait until next week to see which one it is! Well, I hope you have a marvelous week everyone! 

Wednesday, April 18, 2012

Dahlia Pattern Spotlight!

Dahlia

It's funny how I think I am going to spotlight one of my quilt designs once a week, and I get about 5 weeks in (several months ago) and forget it for a while.  So, since Spring is here and I love, no LOVE this pattern - I figured it's a good time to spotlight one of my favorite designs.  I give you Dahlia!  Named, of course, because of the flowers in the quilt.  

Dahlia

This is also my first pattern where I quilted my sample exactly like I wanted to.  Most of my own designs just have a simple allover quilting job, but I really wanted this quilt to pop because I happen to love it and will never, ever let anyone have it but me! (Sometimes I just can't share) The quilt is currently hanging in my Studio and I couldn't be happier just staring at it all day!  
So, before you get all worried that you have to do applique on this quilt - don't - because this quilt is all piecing.  Small piecing at times, but so worth the effort!  
 

And, since I figured out the whole PDF thing - you have the option to buy this pattern in paper or in PDF form!  Gotta love that!  

A few people have questioned me about the shipping charged on our PDF patterns.  So, here's the deal - if you are just buying PDF patterns, and want free shipping - just enter the code "pdf" during checkout - be sure to hit recalculate.  If you are purchasing fabric, please don't use the code because we won't ship your order out until you have paid for shipping.  :-)

Oh, and Tradewinds and Summersville precuts are here!

I think that is about it! I hope you are having a wonderful week!  


Monday, April 16, 2012

In the works.......

1

With most of my quilts, I design as I go.  Sometimes it works out perfectly, and sometimes I am kicking myself because I wish I would have done something different.  Because of the way I design, I have to take a break from my projects and work it out in my head before I do something drastic like "quilt what I can't take out." That would be awful.  Truthfully - I can't and won't ever take out my quilting - there's too much of it.  

2

So, when a plan works out and I love what I am quilting, then I can move forward knowing exactly what I am quilting.  This takes a huge amount of pressure off me and then comes the fun part of quilting a quilt.  

So, that's where I am at - the fun part where I know what I am doing.  Thank Heavens for that! 

Thursday, April 12, 2012

Country Picnic

I finally have jumped on board with PDF downloads.  I can't believe how long it has taken me to get this done, talk about tedious and redundant work.  After several weeks of working out all the kinks - I can finally say that most of my patterns are now available as PDF downloads. Yay!  And from now on all my patterns will be available in paper and PDF files. Took me long enough, sorry!  Best thing about this news is that my Quilting Templates are also downloadable files now too - no more waiting for me to email the file - that's a relief!

Untitled

Anyway - this cute quilt is the one that was featured in Quilts and More in Summer of 2010 - now I have it available as a pattern in my shop.  It's a Jelly Roll - Layer Cake pattern - or a good ole stash buster.  So, here it is in paper - and as a PDF

Untitled

I worked on my pattern fronts too - that was a lot of work, but I think they all look better now.  Be sure to check out my pattern page so you can see the improvements.

Untitled

Still one of my favorite patterns! :) 

And now for some pictures from my Flickr group. I am hoping more of you will join my Flickr group and show me how you have made up my patterns.  It is so fun to see the different fabrics used to make each pattern unique and fun.  So, join here and show me your projects!  I would love it!  

Green fairy butterfly quilt in periwinkle and green

This picture is of my Butterfly pattern from jndewalt21 photostream.  
I love how this quilt came together! So, cute!  
 
Flower Patch

Flower Patch done by Bonnie363 - oh my, I love it!  And I love how she quilted it.  This pattern is still at the top of my list of my favorite designs.  It is just so fun to make!  


This quilt pattern is Daisy Mae made by Love That Fabric's.  It turned out so cute! So, now comes the begging part - please share with me your pictures of your finished Green Fairy Quilts patterns.  If you don't have a Flickr account and want to share your pictures, just send me the photo and I will add it to the group.   

Okay - so there is no confusion - I have two pages of patterns now, paper and PDF - make sure you are on the right page when ordering. :-)

In other news, check out our Clearance Page, and we finally have Vintage Modern and Petite Odile in stock!

Thursday, April 5, 2012

Swooning.

Untitled

Thanks to all the words of encouragement from my last post.  It gave me the kick in the pants I needed to get quilting on this thing.  I like it so far, but this is just a tiny part of the quilt and I have lots more quilting to go.

My First Swoon Block

I decided that I have to keep my sanity in tack so I am working on a few projects here and there.  This block is Camille's Swoon - I am sure you already know that, since I think everyone is making this quilt because it is so darn cute!  I want to make two quilts for two of my boys who share a room, and it will be so fun to have a Swoon quilt on each of their beds.  I am using a Reunion fat quarter bundle, so every block is going to be different.  One block down, eleven to go.  This block is huge, so I only need six blocks per quilt for their twin size beds.  

2

And since there are a whole ton of half square triangles left over from the Swoon block, I am making a third quilt as I go along.  I have to admit that in the past I have just chucked these darn scraps because the reality is, I will never get to making a scrap quilt.  But, I have made a little rule for myself on this quilt - I can't make another Swoon block until I have finished my HST pinwheel block.  (Yes, you can make a 9 patch pinwheel block using just the scraps from 1 Swoon block).  I look forward to making these quilts, I will fit them in when I can because I realize that to keep my sanity I have to be doing lots of projects all the time.  :-)

***UPDATE*** Okay, I feel like a dork because I said you will have a lot of HST's leftover from the block, but you won't have as many as me when you follow Camille's pattern, which you should do! But, I am always trying to find ways to make it so there are less seams in my quilts so that when it comes to quilting it will look better for my quilting designs.  Because of this and me not following directions I did have more waste when it came to the HST's and was able to make a 9 patch pinwheel block.  Sorry for the confusion. 

Okay, couple of things.  Go check out Sherri's blog, she is doing a giveaway for us. Also, we have a lot of Riley Blake Fat Quarter Bundles added to our Riley Blake Designs page - be sure to check it out here.  

Monday, April 2, 2012

Quilter's Brain......

Untitled

Quilted Bag - nothing to do with the post, but just a nice picture to break up the ugly one below! :)


I always feel guilty when I haven't posted for a while - it's been a week and I feel like I owe an apology to you readers, so sorry!  I have had a ton going on, that's for sure.  From helping Clint catch up with all the orders, to dealing with taxes and renewing my license, add in kindergarten shots plus kids and you can count that as a crazy week for me.  It isn't hard for me to get these things done, but the projects and have to's that are mulling around in my head and not getting them done are what bother me.  

So, one day last week Clint had me do a little exercise - that's the picture above - I was supposed to make three columns and write out 1-10, a-j, and I - X, but writing one letter/number in each column like this: 1-a-I, 2-b-II, then to the end.  He timed me - I did horrible, it took me 112 seconds to write out something that should come easy.  Then, he had me do the exercise again but completing each column going from 1-10, a-j, etc..... It took me 33 seconds. So, moral of the story - stick to one project and get it done, then move on to the next project.  Apparently it's a lot easier said than done.  I can't just stick to one project because one project means 40 hours of quilting without any relief from the detailed crazy quilting.  Seriously - I have to fit other projects in, so I do, but then my brain is always in hyper drive and then I go crazy.  It's funny how I think I figure things out and improve my use of time, but it always comes back to a disorganized brain and results in a "I don't want to face it" attitude.  This results in a weekend of finishing book 2 and 3 of the Hunger Games - I cried like a baby when I finished the books.  I was so consumed in the story because it took my mind off the have to's that I realized nothing (quilting related) was going to get done until I finished the story. 

I am happy to say that tonight I have worked a little on a project that I will share soon, and I have my next quilt on the racks - I just need to get moving on it. Sometimes I just need a little kick in the pants to get me motivated!