Thursday, August 25, 2016

Red and White Quilty love!

1 
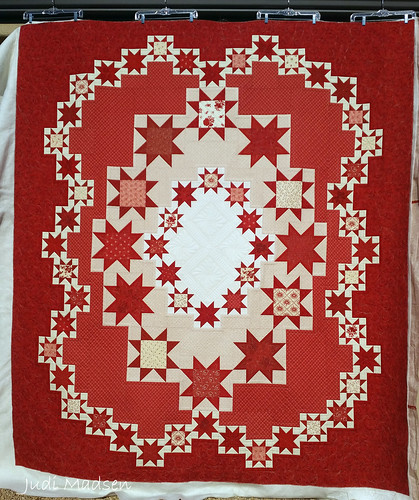
So, this quilt is pieced by Jan.  It is a gift for her daughter who loves the color red.  I think it looks amazing and I had a lot of fun quilting this top up.  This is a design from Judy Martin's Stellar Quilts book, I found it on Amazon, here
Okay,  I used Glide thread, 1 layer of Hobbs 80/20 Cotton/Poly batting and Magna Glide bobbins.  Hopefully that answers all the questions before they are asked. ;-)

2 
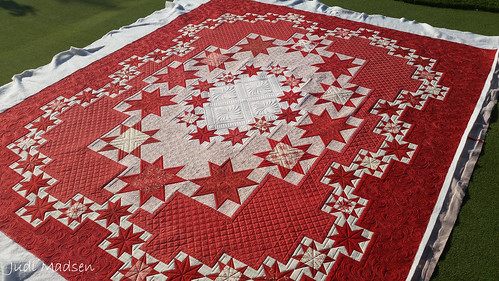
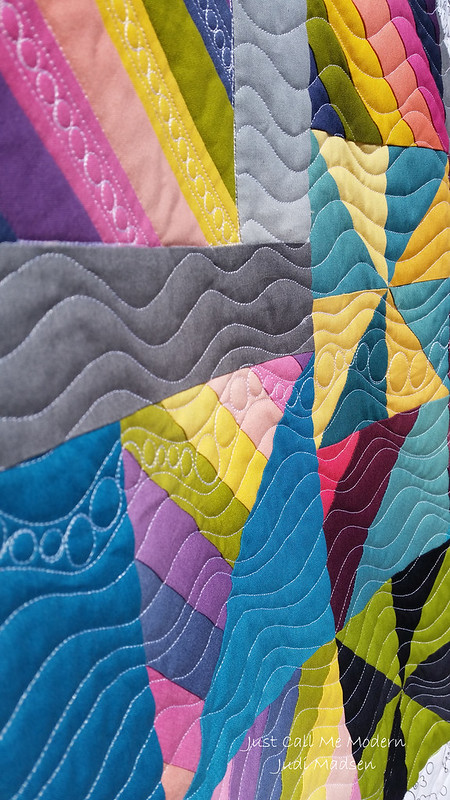
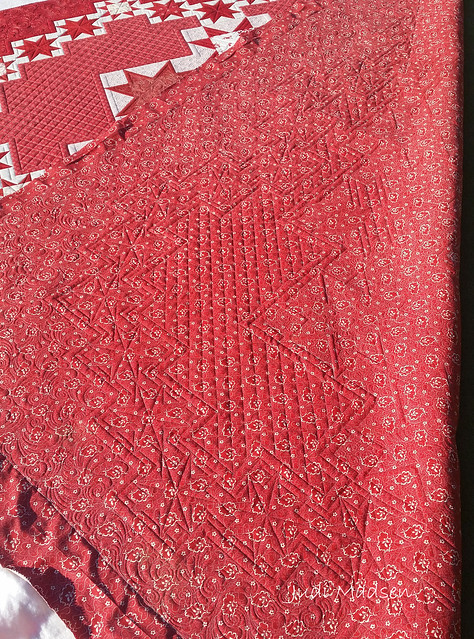
The goal for me was to not do as much tight quilting on this top.  This is more of a cuddle quilt and will be on top of a bed.  So, I did my very best to take out a lot of the detail I normally put into quilts and this is the end result. It looks perfect! I just love it.

3 
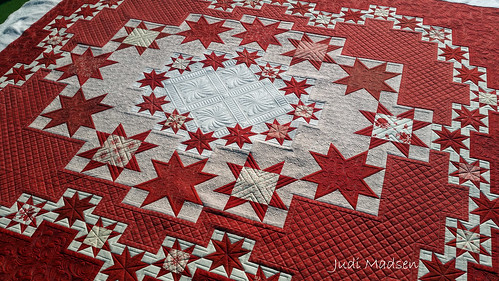
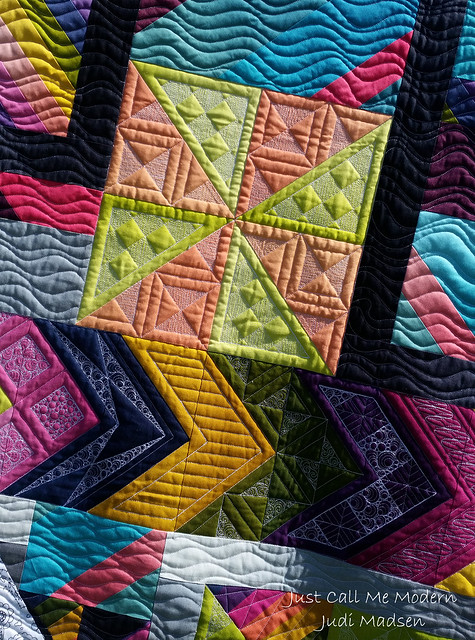
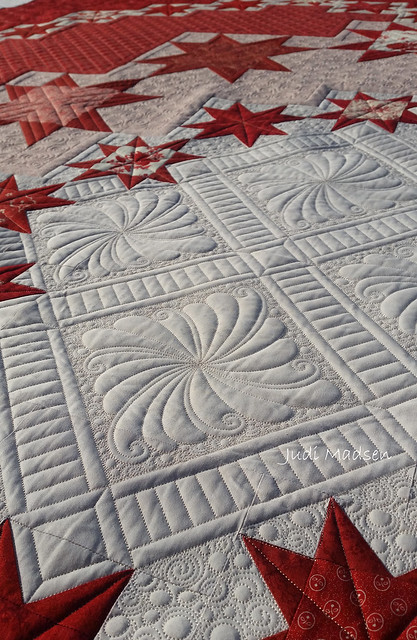
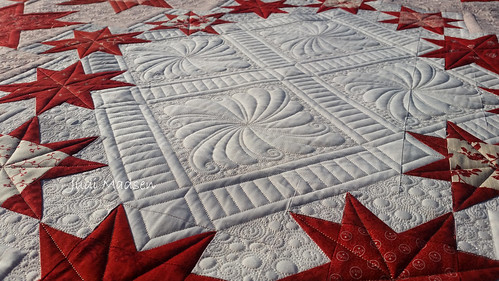
The center of the quilt screamed "detail" at me, so you know - I had to do more on this one area of the quilt. Forgive me, please....

4 
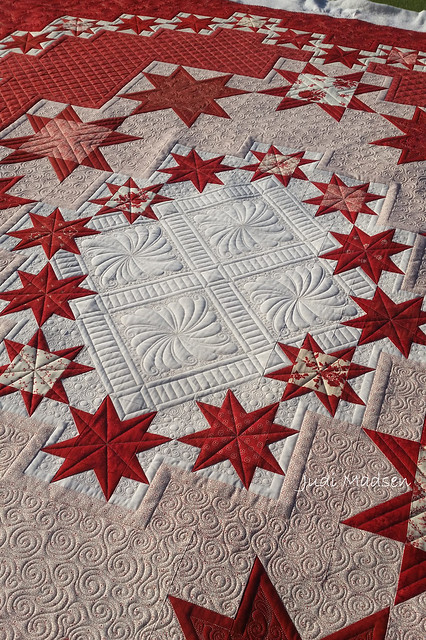
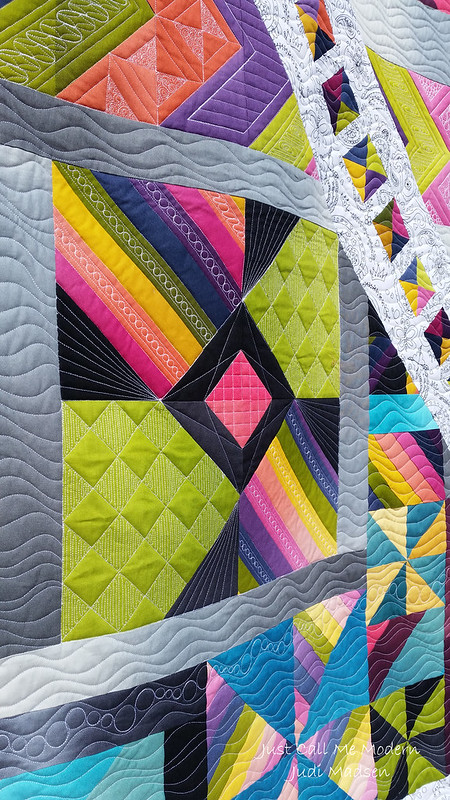
You can see how the center design works perfectly with the rest of the quilt.  I loved playing with the lines and coming up with the four squares with the feather wreath in the center of each one.  The feather wreaths also work well with the feather swirl design in the outside border of the quilt. 

5 
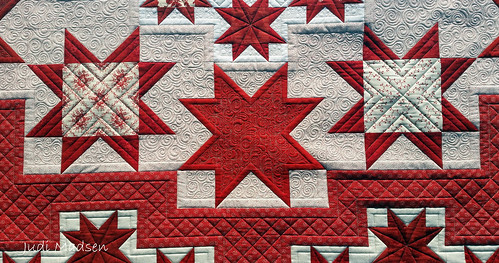
I think the stars worked out perfectly.  The straight lines emphasize the shape of the star and the quilting in the background makes them pop. 

6 
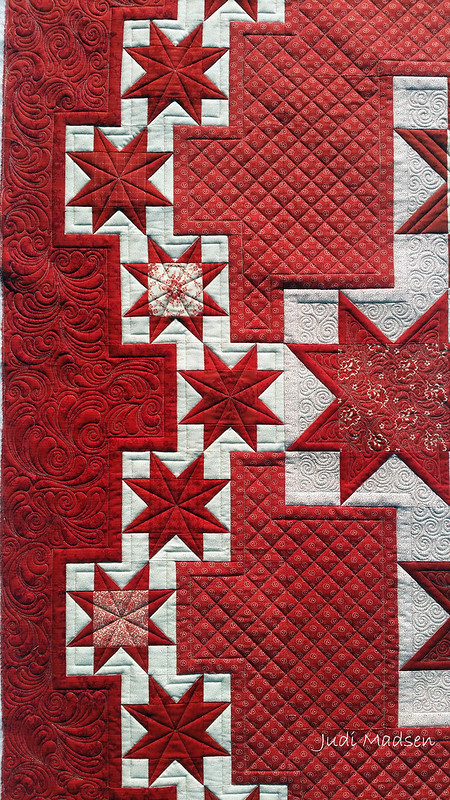
The star border was a little tricky at first, I wasn't sure what to do with it, but then realized that the pieced design would look better if I just echoed it with straight lines. Also, the cross-hatch worked out perfectly and compliments the design of the quilt so well.

7 
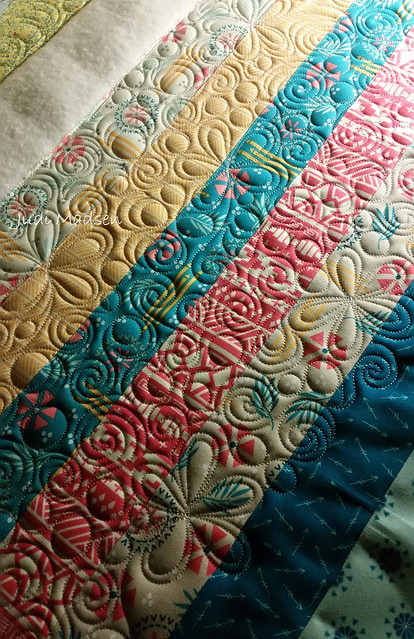
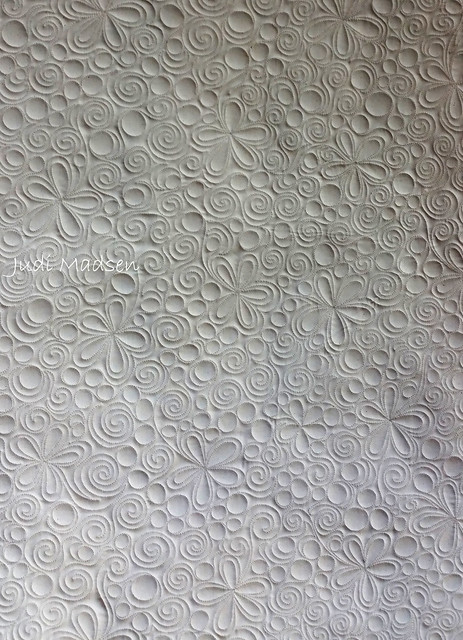
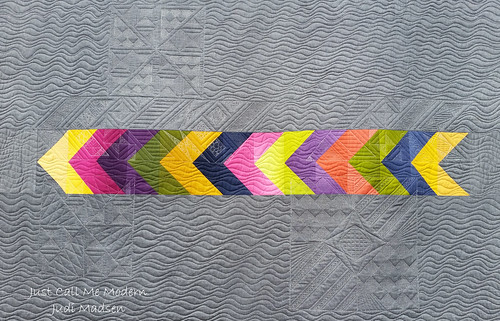
Doesn't this pictures just make you want to rub your hands over the amazing texture?  Don't worry, I did plenty of that for you.  This really is the most satisfying part of quilting for me, seeing the designs come out in the background and feeling the texture. 

8 
I can't thank Jan enough for letting me work on this quilt.  I really hope her daughter loves it.  

9 
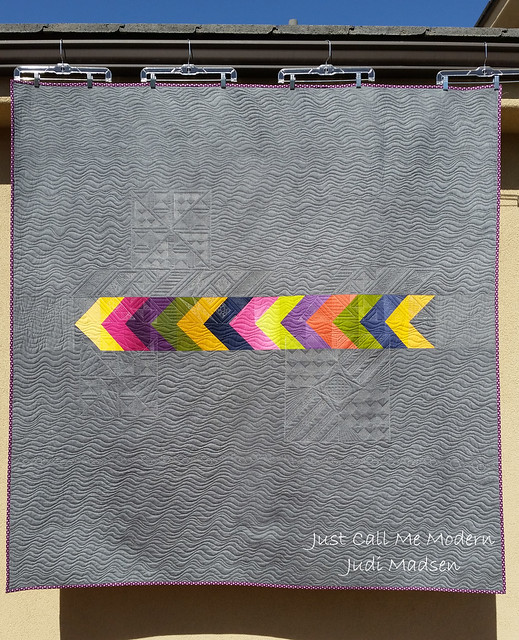
She picked a fun backing too, it shows the quilting really well. 


Thursday, August 18, 2016

Carry All Tote remake...

1
After such a busy spring/summer teaching schedule, I was desperate to make things. Teaching is a wonderful thing that I get to do, but I am happiest when I am creating. So, this summer I finished my Metro Medallion, Just Call Me Modern and I wanted to make my Carry All Tote pattern again. This project was meant as a gift though, so it was a lot more fun to make.  I planned on making 4 totes, but I am a huge under-estimator (is that a word?) when it comes to the time it takes me to do things.  I forget to factor in every day life, which is wonderfully crazy.

Anyway, I sewed some jelly roll strips together.  This fabric line is Bright Sun by Sherri and Chelsi of A Quilting Life.  It is by far my favorite fabric line they have designed and is perfect for a fun summer time tote.

I sewed the strips together then loaded them onto my machine with 2 layers of batting and a muslin backing.  I quilted a fun free motion flower-swirl-pebble design and I really love how the texture shows up. I used a cream colored Glide thread for the stitching. 

2
Here is a fun view of the back.  I really had fun quilting this up.

3
Once the quilting is all finished, then you have to cut out all the pieces for the totes.  This part is hard for me because I hate ruining the beautiful quilting.  I make sure to sew a stay-stitch around each piece so that my quilting stitches don't come out during assembly.

4
After I gifted this tote to my mom, she loved it! - I was able to get a couple of pictures.  This is the front view.

5
And the back.  So cute!

Want to make your own?  You'll need a jelly roll, or a honey bun with some yardage and you can buy the pattern here!

PS - you can make two totes out of one jelly roll - or just use 20 strips instead of the 40 honey bun strips the pattern calls for. Have fun!

Thursday, August 11, 2016

Just Call Me Modern take 2

1 
So the kids are in school today - that means that I have no more excuses to keep up this blog and I am so excited to share this quilt with you, finally.  I made it this quilt as an example of another version of my pattern, Just Call Me Modern? to take to the Oregon Coastal Quilters Guild in July.  That was a fun trip!  Those of you who follow me on Facebook and Instagram would have already seen snippets of this quilt, but I am happy to say that I now can share the entire quilt with you.

2 
I wanted to create a totally different look with this quilt compared to my original one. The fabrics are so out there on this quilt, the V and Co Ombre fabric for the inside piecing was perfect.  It really made me step out of my comfort zone and do something different than I normally do. 

3 
Let's just say I didn't have time to do a full custom quilting job on this quilt, but I did add some amazing detail to some of the blocks.  The white thread I used was on purpose, it worked well and disappeared in the background fabric, then gave an awesome look to the plain fabrics. 
I used White Glide thread with Magna Glide bobbins and I used only one layer of Hobbs 80/20 cotton poly batting.
4 
I can't tell you how much fun it was to quilt these arrow blocks.  I tried to create a new design for each one, but ended up with a couple repeats.

5 
The pinwheel block quilting above gives a whole new dimension to the pinwheel.  The texture is unreal and I am so please with the quilting.  I think I could make a whole quilt with pinwheels now and quilt them all exactly like I have on this block. 

6 
The waves in the background are really fun and I guess you can say that this quilt is a little more modern than my traditional approach to quilt design. 

7 
I had to throw in one row of beads.  So fabulous! 

8 
I used Moda Crossweave fabric for the back. When I was making the arrow blocks for the top of the quilt, I just made two arrows at a time to make another row for the back of the quilt.  I really love how it turned out. 

9 
It's kind of crazy how close my arrow quilting is to the arrow row on the back, you can see that above.  I should have planned that better, right?  Haha - that would have been a nightmare.

10 
Oh, and what would I do without a tall, handsome man to help me?  Clint is so good to put up with all of my great ideas to take pictures outside and connect the quilt to the rain gutter. I just really wanted outside lighting for this quilt. I think it was worth it.
 
11 
This last picture is a throw back to my time in Newport, Oregon and the setting was absolutely perfect.  The wavy quilting goes perfect with the waves of the ocean and I can see this quilt being a special beach quilt in the future. 

Okay, so if you love the pattern and want to make your own, buy the paper version here, or the PDF version here.  

Also, if you haven't preordered my second book, you should.  Like now.  Thanks everyone for your support!